
How to Plan the Skyline Loop Without Underestimating the Mountain
Plan the 5.5-mile, 1,700-foot loop from Paradise, including direction, difficulty, timing, snow checks, shortcuts and turnaround points.
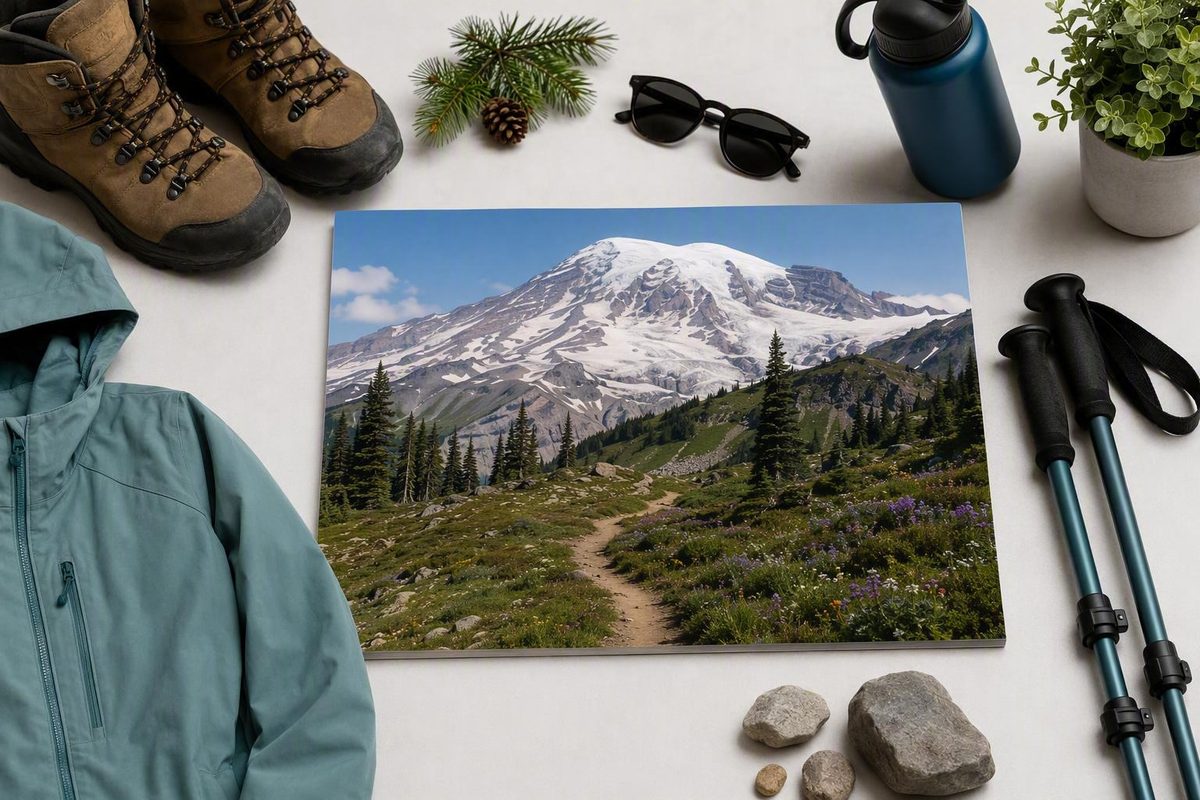
The Skyline Trail in Mount Rainier National Park compresses a remarkable amount of scenery into a relatively short loop: close views of Mount Rainier and Nisqually Glacier, subalpine meadows, waterfalls, and broad Cascade panoramas when the weather cooperates. It also involves sustained climbing, exposed terrain, fast-changing weather, and snow that may remain after lower-elevation trails have melted out.
The right plan is not simply “hike Skyline clockwise.” Arrive with several possible objectives—the full loop, Golden Gate, Panorama Point, Glacier Vista, or Myrtle Falls—and choose among them using the conditions, available time, and abilities actually present that day.
Skyline Trail at a glance: use the official baseline
Skyline Trail quick facts
- Location: Paradise, Mount Rainier National Park
- Official distance: 5.5 miles round trip
- Official elevation gain: 1,700 feet
- Official estimated time: Approximately 4.5 hours
- Route type: Loop
- Use: Day hiking only
- Practical planning window: Roughly 4–6 hours for many first-time plans
- Primary reassessment point: Panorama Point
The distance, elevation gain, and estimated hiking time are from the official NPS Skyline Trail guide.
The trail begins near the entrance to the Henry M. Jackson Visitor Center at Paradise, beside stone steps bearing a John Muir quotation. Paradise is designated for day use, and there are no wilderness camps along the loop.
Treat the official figures as the planning baseline. They describe a compact but physically demanding mountain day, not a casual paved walk around a visitor center. Parts of the lower trail are paved or highly developed, but the complete circuit enters exposed subalpine terrain and may include rocky footing, gravel, steps, snow, or ice.
You will encounter other measurements online. Third-party descriptions range from about 5.4 to 6.2 miles and roughly 1,450 to 1,900 feet of elevation gain. Washington Trails Association, for example, lists 5.5 miles and 1,450 feet of gain, while other mapped versions are longer. These differences are documented across published guides, including the Washington Trails Association listing.
That disagreement does not necessarily mean someone followed the wrong trail. Not every discrepancy can be reconstructed from a published number alone. Use the NPS figures for initial planning, then identify the specific variant you intend to follow.
Although 4.5 hours is the official estimate, allowing roughly four to six hours is more conservative for a first visit. That planning range accounts for photographs, food, route checks, crowds, weather assessment, and slower movement over loose or snowy ground. It is editorial planning guidance rather than an official completion-time range.
A fast personal trip report should not become your deadline. Nor should taking six hours be treated as failure: pace varies with fitness, footing, visibility, breaks, and group size.
The key implication is simple: a 5.5-mile trail can still occupy most of a usable mountain day. Driving, entry procedures, parking delays, pre-hike preparation, and an early turnaround all require time outside the official hiking estimate.
How difficult is the Skyline Loop?
“Moderate” and “hard” both appear in reputable descriptions of Skyline. The labels differ because trail ratings are subjective and because conditions can transform the route. Washington Trails Association classifies the loop as moderate, while AllTrails lists a 5.7-mile version with 1,781 feet of gain as hard. Neither label alone establishes whether your group should complete the loop today.
On a dry, clearly visible trail, Skyline can be strenuous but reasonably straightforward for a prepared day hiker. Its baseline demands include:
- Sustained climbing over a relatively short distance
- A steep opening climb when traveling clockwise
- High, exposed subalpine terrain with little shelter
- Rocky, gravelly, or loose sections
- A substantial descent that can tire knees and legs
- Elevation that may make a familiar pace feel less comfortable
- Multiple junctions within the wider Paradise trail network
The short mileage can be misleading. A person comfortable walking six level miles may not be comfortable gaining 1,700 feet, descending the same amount, and doing both in exposed mountain terrain. Conversely, a hiker accustomed to steep routes may find the dry loop manageable even when a trail platform labels it hard.
Conditions create a second layer of difficulty. Snow can obscure the constructed route and make navigation less obvious. Ice can turn an ordinary section into a fall hazard. Clouds can remove landmarks and make junction decisions more consequential.
Evaluate the hike through practical questions rather than one adjective:
- Can everyone climb continuously at a sustainable pace?
- Is anyone likely to struggle with a long or steep descent?
- Are knees already sensitive before the hike begins?
- Has the group traveled safely on the surface reported that day?
- Is everyone comfortable in open terrain with little shade or shelter?
- Can the group navigate if clouds hide the mountain and mobile service fails?
- Is there enough time and energy to finish without rushing?
A novice who is fit, well equipped, and following a dry, clearly marked route with a conservative plan may have a good day. An experienced hiker can still make the right decision by turning around when ice, visibility, or weather exceeds the plan.
Age alone does not determine suitability, and neither does the presence of children. Judge the actual abilities of the group, especially the least comfortable member. The full loop should never become an obligation simply because it was the original goal.
A waypoint-by-waypoint guide to the full loop
This walkthrough uses the common clockwise itinerary and follows the general direction of the NPS route description. Exact alignments can change with snow, closures, restoration work, or ranger guidance, so treat it as orientation rather than a substitute for current signs and an official map.
Paradise and the stone steps: Begin near the Henry M. Jackson Visitor Center. The recognizable stone steps beside the John Muir quotation lead uphill into Paradise Meadows. This opening can create a false impression in either direction: pavement does not mean gentle grades, and developed surroundings do not continue around the entire loop.
Paradise Meadows: The clockwise route climbs quickly through the meadows. Mount Rainier may dominate the view on a clear day, but cloud can hide it completely. Stay on the constructed trail even when flowers, snow, or a photograph appear to offer a reason to step into the vegetation.
Glacier Vista: Continue along the western side of the loop toward Glacier Vista. When visibility permits, this viewpoint looks toward Nisqually Glacier. It is also a practical turnaround point. Reaching a named viewpoint and returning safely can be a complete hike rather than an incomplete loop.
Panorama Point: On the clockwise NPS itinerary, Panorama Point is reached after approximately two miles. It is one of the route’s principal viewpoints and an important place to pause. Clear conditions may reveal the Tatoosh Range and distant Cascade peaks; clouds can remove those views within minutes.
More importantly, Panorama Point is a decision point. Reassess:
- Weather direction and cloud development
- Wind and temperature
- Snow or ice beyond the viewpoint
- Footing on the route ahead
- Group energy and downhill comfort
- Remaining daylight and schedule
- Confidence about the next junction
Turning around preserves a known return route. Continuing commits the group to higher terrain and eventually to the eastern side of the circuit.
High Skyline decision: Beyond Panorama Point, do not confuse two routes that serve different purposes. High Skyline is the alignment NPS directs hikers to use when necessary to avoid a persistent, potentially dangerous icy slope on the lower route. It later reconnects with Skyline above the Golden Gate junction. Golden Gate, by contrast, is primarily a distance-saving shortcut. The route relationship and seasonal icy-slope concern are also described in the Washington Trails Association Skyline guide.
If signs or rangers direct hikers onto High Skyline, follow that instruction. Do not select the lower alignment merely because an older trip report, downloaded track, or GPS arrow appears to favor it.
Golden Gate junction: After the High Skyline area, the route approaches the Golden Gate connection. This is where hikers can shorten the day rather than continuing around the full circuit. Golden Gate can save approximately one mile, but it remains a mountain trail and can be steep.
Stevens–Van Trump Memorial area: Continuing on the standard circuit leads through high terrain toward the Stevens–Van Trump Memorial and the Paradise Glacier Trail junction. Pay close attention to signs because several destinations and connectors meet in this broader area.
Sluiskin Falls and Paradise Valley: The descending route continues toward Sluiskin Falls and through the Paradise Valley side of the trail system. The grade is generally more gradual than the initial clockwise climb, but gradual does not mean effortless. Fatigue, wet surfaces, and repeated downhill steps can make the return demanding.
Myrtle Falls: Near the end of the loop, the route passes the Myrtle Falls area before returning to Paradise. This section is also used by visitors taking the much shorter falls walk, so expect the surroundings to become more developed and potentially busier.
In clear weather, the circuit can provide close views of Mount Rainier, Nisqually Glacier, subalpine meadows, waterfalls, and distant peaks. None is guaranteed. Clouds can erase Rainier and distant volcanoes while the lower trail remains visible. A cloudy hike can still offer creeks, waterfalls, meadow textures, and views into glacial terrain.
Carry an official paper map or a downloaded offline map. The Paradise network contains multiple junctions, and a route that appears obvious while the mountain is visible can feel very different in fog. Do not depend on a live data connection.
Clockwise or counterclockwise: choose by grade and conditions
Neither direction is universally best. Clockwise is common and is the direction used in the official NPS description, but counterclockwise may suit a group that values a gentler start more than an easier final descent.
Clockwise travel begins with the steeper sustained climb through Paradise Meadows and the western side of the route. That has three practical effects:
- The hardest sustained climbing is completed while legs are fresh.
- Glacier and mountain viewpoints arrive relatively early.
- The eventual descent through the eastern side is generally more gradual.
The disadvantage is immediate effort. A group can begin too quickly on the steep paved grade, overheat, or use too much energy before settling into a sustainable rhythm. Starting slowly is usually more useful than matching nearby hikers.
Counterclockwise travel starts toward Myrtle Falls and Paradise Valley. The opening generally gains elevation more gradually, allowing the group to warm up before reaching higher ground. The tradeoff is that a steeper descent may come later, when legs are tired.
That matters for hikers with knee sensitivity or limited confidence on loose downhill terrain. A grade that feels efficient as an ascent can feel much less comfortable as a descent. Trekking poles may help some hikers with balance, but they do not make an unsuitable route profile appropriate.
Use this selector:
- Choose clockwise if the group prefers to complete the steepest sustained climbing early and is comfortable with a direct opening ascent.
- Consider counterclockwise if a more gradual beginning matters and everyone accepts a steeper descent later.
- Choose a shorter objective if neither profile fits the group’s uphill ability, downhill comfort, available time, or current conditions.
Some hikers describe one direction as quieter, better lit, or more scenic. Those are subjective preferences rather than promises. Crowd flow changes by time and date, light changes with cloud, and the preferred sequence of views varies by person. Firsthand guides themselves disagree; one detailed two-direction Skyline comparison favors counterclockwise, while other guides prefer clockwise.
Conditions outrank preference. Snow, ice, closures, trail work, or ranger instructions may make one direction or one section inappropriate. A direction that looks easier on an elevation profile may be the wrong choice under the day’s actual conditions.
Full loop or shorter hike? Match the route to the day
Skyline is best understood as a menu of objectives rather than one all-or-nothing hike. Before leaving Paradise, decide what conditions would trigger a shortcut or turnaround.
| Route option | Approximate scope | Best used when | Important limitation |
|---|---|---|---|
| Full Skyline Loop | 5.5 miles, 1,700 feet, about 4.5 hours officially | Conditions are suitable and the entire group has adequate time, fitness, equipment, and downhill comfort | Highest commitment; upper and eastern conditions may differ from the lower trail |
| Golden Gate shortcut | Cuts approximately 1 mile from the full circuit | The group wants a shorter loop or needs to reduce distance | Still steep; not an easy or hazard-free escape route |
| Panorama Point out-and-back | Approximately 4 miles in some guides, depending on the chosen path | A major viewpoint is the goal without committing to the eastern side | Retains the steep western climb and may encounter snow or loose footing |
| Glacier Vista turnaround | Shorter western-side out-and-back | Visitors want mountain and glacier scenery with an early reassessment point | Exact distance depends on the selected junctions, and views require visibility |
| Myrtle Falls walk | 1 mile round trip; about 35 minutes officially | Time, ability, or conditions rule out a longer hike | Short route only; it does not represent the terrain of the full loop |
The Golden Gate and Panorama Point estimates vary by route choice, but a firsthand guide describes Golden Gate as reducing the loop to roughly 4.6 miles and the Panorama Point out-and-back as approximately four miles. Treat both as planning approximations rather than surveyed guarantees, as explained in this route-options guide.
Full Skyline Loop: Use the NPS baseline of 5.5 miles, 1,700 feet, and approximately 4.5 hours. Add time if your group takes long breaks, photographs frequently, or expects slow footing. Choose the complete circuit only if current guidance supports it and the group can manage both the climb and the descent.
Golden Gate shortcut: Golden Gate reduces the circuit by approximately one mile. That can meaningfully shorten the day, but the connector may still be steep and tiring. Think of it as a distance-saving route, not a simple stroll back to the parking lot.
Panorama Point out-and-back: Published estimates vary with the exact approach and mapping method, but some guides describe this plan as roughly four miles. Its principal advantage is flexibility: hikers can return on the known western route rather than committing to the eastern half. It is especially useful when the climb has taken longer than expected or conditions beyond the viewpoint are uncertain.
Glacier Vista turnaround: Glacier Vista is an earlier objective on the western side. In clear weather, it can provide mountain and glacier scenery without requiring the full ascent to Panorama Point. It also creates a useful test: if reaching Glacier Vista has already consumed more time or energy than planned, turn around there.
Myrtle Falls: The short falls route begins on the north side of the upper Paradise parking lot. NPS lists it as one mile round trip with an estimated hiking time of 35 minutes and describes it as wheelchair accessible with assistance in its official Mount Rainier day-hiking guidance.
Remember the distinction between High Skyline and Golden Gate. High Skyline is a safety-related alignment used to avoid a hazardous lower slope when that concern applies. Golden Gate is the primary shortcut for reducing the circuit’s distance. Taking High Skyline does not mean you have taken the Golden Gate shortcut.
Shorten the route or turn around if:
- Weather is deteriorating
- Snow or ice creates footing beyond the group’s experience
- Visibility makes navigation uncertain
- Someone is more fatigued than expected
- The group lacks equipment suited to reported conditions
- Progress would put the return too late in the day
- A junction is unclear and the correct route cannot be confirmed
- A ranger, closure, or sign directs you away from the planned alignment
The goal is not to collect every waypoint. It is to choose a route whose return remains controlled.
Season, snow, wildflowers, and the conditions-first decision
Summer and early fall are commonly suggested for Skyline, but the calendar is only a rough planning tool. It cannot confirm whether the upper route is dry, whether an icy traverse remains, whether smoke or clouds will obscure views, or whether facilities will be operating.
Snow and ice can persist into summer, particularly in higher terrain and beyond Panorama Point. Traveler reports have documented lingering July snow and ice, but those reports describe particular dates rather than a dependable annual schedule. Conditions can differ significantly from one year to the next, as reflected in the collected experiences on the Skyline Trail review page.
Wildflowers are commonly associated with July and August, but bloom timing also varies. Treat flowers as a possibility, not a reservation. The same principle applies to wildlife sightings, an unobstructed Rainier view, and distant-volcano panoramas.
Use this conditions-first sequence:
- Check official park information. Review alerts, trail conditions, weather, road access, construction impacts, and facility information.
- Identify the reported surface. A statement that a trail is open does not necessarily mean it is dry or appropriate for every hiker.
- Compare conditions with skills. Decide whether everyone can travel safely on the reported snow, ice, loose ground, or wet terrain.
- Match equipment to the report. Do not decide that traction, snowshoes, crampons, or an ice axe are required—or sufficient—based only on the month.
- Choose the route. Select the full loop, High Skyline, Golden Gate, an out-and-back, or a shorter objective.
- Reassess on the mountain. Turn around when conditions differ from the report or exceed the group’s experience.
Pre-trip verification — article reviewed September 7, 2026
Conditions, access rules, closures, fees, reservations, roads, and facility operations can change. Before departure, review the official Mount Rainier current conditions and alerts, then recheck on the morning of the hike. When available, ask park staff at Paradise about the upper route. The review date above is not confirmation that Skyline is currently open, dry, or safe.
When the persistent icy slope beyond Panorama Point is a concern, follow current signs and ranger guidance directing hikers to High Skyline. If the advised route exceeds the group’s skills or available equipment, turn around rather than attempting an unsuitable alternative.
Gear does not convert unfamiliar terrain into safe terrain. Carrying traction does not mean a person knows when it will be effective, and possessing technical equipment does not provide snow-travel experience. Choose another objective when the reported or encountered terrain exceeds the group’s abilities.
Cloud can change the value of the hike without necessarily ending it. When Rainier disappears, lower meadows, creeks, waterfalls, and glacial terrain may remain worthwhile. But if cloud reduces navigation confidence or arrives with wind, precipitation, or falling temperatures, scenery should not override the turnaround plan.
Paradise logistics: parking, facilities, navigation, and access
The Skyline trailhead is near the Henry M. Jackson Visitor Center at Paradise. The upper parking area provides access to several paths, but the parking lot itself should not be mistaken for a single unmistakable Skyline entrance. Confirm the intended route at a map board, the visitor center when open, or a signed junction before climbing.
Paradise is popular, and parking can fill. Arriving early may improve the plan, but no arrival time guarantees a space. Weather, weekends, construction, road delays, and park operations can all affect demand.
Keep a backup plan rather than assuming another space will appear; the rule is included in the park’s official congestion and parking guidance.
Before the trip, verify date-sensitive logistics directly with NPS:
- Road and entrance access
- Construction or detours
- Current entry requirements
- Fees and accepted passes
- Any reservation or timed-entry system
- Visitor-center hours
- Food-service availability
- Potable-water availability
- Restroom operations
- Current parking or transportation instructions
Avoid copying an entry fee or reservation rule from an old blog post. A requirement that applied during one season may not apply on your exact date.
Paradise is the main service point for restrooms, information, food, and water, but not every service operates at all times. Carry enough food and water to complete the hike even if a service you expected is unavailable. If you hope to refill bottles, confirm that potable water is operating before relying on it.
A toilet is located near Panorama Point, but its operation is seasonal and should not be assumed. Use facilities at Paradise before starting whenever possible.
Cellular service may be limited or inconsistent. Coverage can vary by carrier and exact location. Download maps, route descriptions, alerts, and essential access information before entering the park. Keep your device charged and carry a physical map as backup.
Do not assume that a shuttle, overflow lot, or alternative transportation service exists unless current official information confirms one for your date. If parking is unavailable and no official alternative exists, the responsible backup may be another trail or another day.
What to carry, park rules, and who can use the paved segment
A dry summer forecast should not reduce Skyline to a bottle-of-water walk. The route enters exposed mountain terrain where conditions can change faster than a group can return to Paradise.
Core packing checklist:
- The Ten Essentials
- Sturdy, supportive footwear suited to the current surface
- Warm layers and effective rain and wind protection
- Sun protection, including sunglasses and sunscreen
- Enough food and water for delays
- A physical map or downloaded offline map
- Any routine medication needed during an extended return
Adapt those categories to a high, exposed day hike rather than treating them as a generic checklist.
Snow equipment belongs in a separate, conditions-dependent category. Traction, snowshoes, crampons, poles, or an ice axe may be useful or necessary under particular conditions, but no fixed month determines the correct combination. Check current reports and carry only equipment you know how to use. Choose a different route when the terrain requires skills the group does not possess.
Carry sufficient water rather than depending on a stream or seasonal facility. Natural water must be treated before drinking. Fires are prohibited along Skyline, Paradise is day-use only, and no wilderness camps lie along the loop. Hikers must also remain on constructed trails to protect delicate subalpine vegetation; these restrictions are established in the official NPS Skyline guidance cited earlier.
Pets and bicycles are prohibited on park trails. NPS also advises day hikers not to hike alone, to tell someone their plans, and to limit day-hiking groups to no more than 12 people. These rules and recommendations appear in the NPS day-hiking guidance.
Pack out wrappers, tissues, and other waste. Do not pick flowers, feed wildlife, or block the trail while taking photographs. When stopping, leave enough room for other hikers to pass safely.
Accessibility requires a precise distinction. NPS describes the short Myrtle Falls route as wheelchair accessible with assistance. That qualification matters because a paved mountain path can still have grades requiring help. Washington Trails Association likewise notes that steep grades on the accessible portion may require assistance, a strong pusher, or sufficient power-chair capacity in its discussion of Skyline’s lower paved segment.
That description does not extend to the full circuit. The complete loop includes sustained steep grades, rocky terrain, steps, exposure, and possible snow or ice. Individual mobility needs and equipment differ, but conditions on the paved lower segment should not be used to infer conditions around the entire route.
Before leaving the parking area, make sure someone outside the group knows the intended route and expected return. If the plan changes substantially and communication is available, update that person.
How long does it take to hike the Skyline Trail at Mount Rainier?
NPS estimates approximately 4.5 hours for the complete 5.5-mile loop. A first-time visitor should consider allowing roughly four to six hours for breaks, photographs, crowds, route checks, and variable footing. A separate firsthand guide also lists the loop at 5.5 miles and 1,700 feet with a planning estimate of three to five hours, illustrating why individual times vary (Skyline Loop hiking guide).
Do not let the clock force a poor decision. If reaching Panorama Point takes substantially longer than expected, reconsider the full circuit.
Is it better to hike Skyline clockwise or counterclockwise?
Neither is best for everyone. Clockwise places the steepest sustained climb near the beginning, reaches Glacier Vista and Panorama Point relatively early, and generally finishes with a more gradual descent. Counterclockwise begins more gradually through the Myrtle Falls and Paradise Valley side but can leave a steeper descent until later.
Choose according to uphill preference, downhill knee comfort, and current conditions. Snow, closures, and ranger guidance override scenic or crowd preferences.
When is Skyline Trail snow-free?
There is no dependable snow-free date. Summer and early fall are commonly recommended, but snow and ice can persist into summer, especially in higher terrain and beyond Panorama Point. Firsthand accounts from different visits have documented markedly different snow coverage between late July and mid-August, reinforcing the need to check current conditions rather than rely on the calendar (seasonal Skyline account).
Can I see Myrtle Falls without hiking the full Skyline Loop?
Yes. Myrtle Falls is available as a separate short walk from the north side of the upper Paradise parking lot. You do not need to complete the Skyline Loop or climb to Panorama Point.
The route uses only a short lower portion of Skyline. Its assisted-accessibility description applies to that short walk, not to the complete mountain circuit.
Are dogs allowed on Skyline Trail?
No. Pets are prohibited on Skyline and other Mount Rainier National Park trails. Washington Trails Association also lists dogs as not allowed on the Skyline Loop.
Before starting, use this final decision checklist:
- Verify current NPS conditions and access rules.
- Choose the full loop or a shorter objective based on the least-capable or least-comfortable group member.
- Carry the Ten Essentials and offline navigation.
- Reassess weather, footing, time, and energy at Panorama Point.
- Treat turning around as sound mountain judgment.
Skyline’s scenery is only one part of a successful day. The more important outcome is choosing a route that matches the weather, surface, available time, equipment, and abilities actually present.