
How to Choose the Right Way to See Snoqualmie Falls
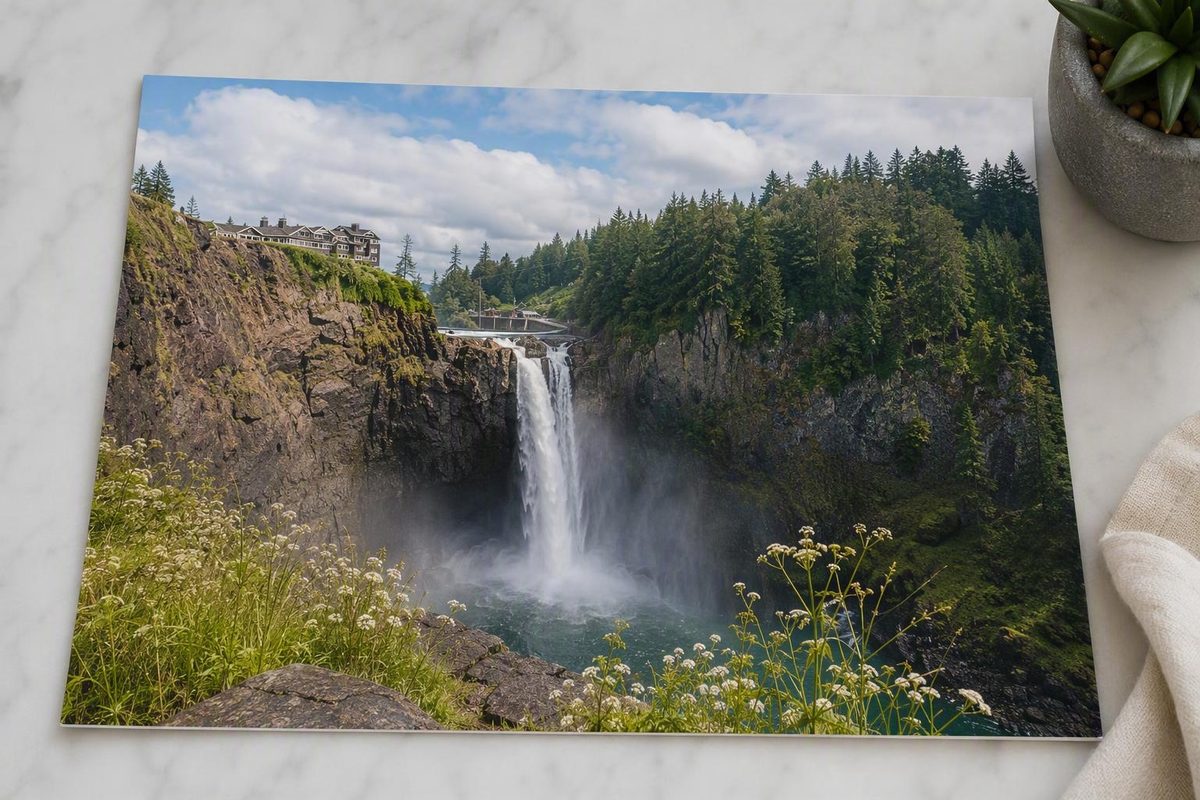
Snoqualmie Falls is unusually flexible for a major scenic attraction. You can see the waterfall after a very short walk, hike from the upper viewing area to the lower viewpoint, or drive between the two plazas and avoid the steep forest connector.
That flexibility matters because the Snoqualmie Falls Trail is more demanding than its short mileage suggests. Starting at the upper area makes the outward leg mostly downhill, but it leaves a sustained climb for the return. The best plan depends less on how many miles your group normally walks and more on how everyone handles grades, wet surfaces, crowds, and the climb back.
- Fees, hours, parking rules, facilities, pet policies, closures, and lower-area access can change. The available sources do not provide a clearly identified operator-maintained live status page for every part of the route, so verify conditions again immediately before traveling.*
Choose Your Visit: Full Hike, Two-Plaza Drive, or Upper Overlook
Start by choosing among three versions of the visit:
| Plan | What you see | Walking and effort | Best for | Main limitation |
|---|---|---|---|---|
| Full upper-to-lower out-and-back | Upper overlooks, forest trail, lower plaza, riverside boardwalk, and lower viewpoint | About 1.4 miles round trip with 250 feet of elevation gain (Washington Trails Association) | Visitors who want the complete trail experience and can manage the climb | Short, but physically more demanding than the mileage implies |
| Drive between the upper and lower areas | Upper and lower viewing areas without hiking the forest connector | Short walks from separate parking areas, subject to current lower access | Groups for whom the return climb is the main obstacle | Driving avoids the connector but does not guarantee that the lower deck is open, step-free, or suitable for every visitor |
| Upper overlook only | The easiest and most direct waterfall view | Approximately 200 feet from the nearby paid lot to the wheelchair-accessible upper platform (Snoqualmie Falls visitor information) | Very short visits and people who should avoid a steep trail | Does not include the forest descent or lower perspective |
For the full hike, begin at the upper viewing area, descend through the forest, pass through the lower plaza, and continue along the flatter riverside boardwalk to the lower viewpoint. Then retrace the route uphill. The main connection is approximately 0.7 mile each way.
The key planning fact is not the total mileage but the direction of travel. From the upper area, the first half feels comparatively easy because it is downhill. Anyone who reaches the lower viewpoint on foot must reverse that descent at the end of the outing.
Driving is a practical alternative rather than a lesser version of the visit. Roads allow visitors to travel between the upper and lower areas without walking the steep connector. Driving does not, however, establish that every part of the lower experience is accessible. A third-party route description reports stairs and a boardwalk between the lower parking area and viewing deck, so lower parking, closures, and the precise approach should be checked before departure (lower-area route description).
For the shortest visit, use the upper viewing area only. The documented wheelchair-accessible connection applies specifically to the upper platform near the paid lot. It should not be extended to the complete upper-to-lower trail.
Choose the upper-only plan when time is limited, weather is deteriorating, or anyone in the group should avoid a steep return climb. It delivers the defining waterfall view without committing the group to the connector.
Trail Facts and Why Published Numbers Differ
For planning purposes, use these baseline figures:
- Route type: Out and back
- Distance: Approximately 1.4 miles round trip
- Main connection: Approximately 0.7 mile each way
- Elevation gain: Approximately 250 feet
- Highest point: Approximately 450 feet
- Published walking estimate: About 30–60 minutes
- Recommended total visit allowance: One to two hours
Washington Trails Association is the basis for the 1.4-mile distance, 250-foot elevation gain, and 450-foot high point. The 30–60 minute range comes from another route listing, while the one-to-two-hour allowance is a practical planning recommendation that includes viewpoints, rests, photographs, and congestion.
Not every trail database gives the same measurements. AllTrails lists approximately 1.5 miles, 328 feet of elevation gain, and a walking time of 30–60 minutes (AllTrails’ Snoqualmie Falls Trail listing).
Some databases display longer totals or substantially different grade figures on pages that are internally inconsistent. Those figures are not useful as authoritative measurements for a first visit. Treating the standard outing as approximately 1.4–1.5 miles round trip is more defensible than planning around false precision.
Difficulty labels also vary. Washington Trails Association calculates the route as easy, while AllTrails rates it moderate. Both labels reflect part of the experience.
The route is short, established, and comparatively straightforward to follow. Those qualities support an easy rating. On the other hand, the usual direction from the upper area descends roughly 250 feet and postpones the sustained climb until the end.
A better assessment divides the outing into four parts:
- Upper approaches: Shorter paths near the viewpoints, including paved walking.
- Forest connector: The steeper section, with mixed surfaces and most of the elevation change.
- Lower plaza and boardwalk: Flatter walking, but with potentially constrained spaces and lower-area access details that require verification.
- Return to the upper area: The forest connector in reverse, now uphill.
Moving time is not the same as visit time. A brisk visitor who pauses only briefly may complete the walking portion in 30–60 minutes.
Budget one to two hours for the full experience. Use the lower end when parking is straightforward and everyone moves steadily. Allow longer when visiting with children, stopping at each viewpoint, or expecting congestion.
The Route, Step by Step
The standard Snoqualmie Falls Trail begins around the upper viewing area. Paved approaches lead toward multiple observation spaces overlooking the approximately 270-foot waterfall. Not every optional path or upper deck should be assumed to have identical access conditions.
Before descending, make a deliberate decision about the return. The trail can look deceptively easy at the beginning because the first leg is downhill. Ask whether every person in the group will be comfortable reversing the elevation change after visiting the lower deck.
From the upper area, follow the established connector into the forest. The route descends approximately 250 feet over 0.4 mile and includes interpretive signs about plants, wildlife, Native culture, and the history of the falls.
The connector should not be described as entirely paved. Published route descriptions collectively identify paved approaches, gravel or dirt trail, wooden surfaces, steps, and boardwalk. One trail guide describes the route beginning on paved upper walkways before changing to dirt on the descent and then becoming a riverside boardwalk near the lower area (route and surface overview).
At the bottom of the forest descent, continue through the lower plaza rather than treating the parking area as the destination. The standard route then follows a flatter boardwalk for approximately 0.3 mile to the lower viewpoint. The boardwalk runs beside the river and cliffside and can feel narrow when people are moving in both directions.
It is not unrestricted access to the riverbank or the base of the falls. Stay on the established route and treat gates, railings, and closures as firm limits.
After visiting the lower viewpoint, retrace the boardwalk through the plaza and climb the forest connector. The main physical effort comes near the end of the outing, not the beginning. If needed, pause in the lower plaza before starting uphill.
Keep this public upper-to-lower route separate from trails associated with Snoqualmie Falls Forest Theater. That property describes its own lower, overlook, theater, meadow, and upper trails, including routes that cross property boundaries and have substantially different conditions (Snoqualmie Falls Forest Theater trail information). Those trails are not interchangeable with the standard connection between the upper and lower visitor areas.
Descriptions or photographs of paths leading toward the river do not establish that those paths are authorized, maintained, open, or safe. Do not use an informal track as evidence that visitors may approach the base of the waterfall.
Upper vs. Lower Viewpoint: What Each One Offers
The upper viewpoint is the simplest way to experience Snoqualmie Falls. It is close to parking, provides the most direct first view, and has multiple observation areas nearby. For many visitors, that is enough—especially when time is short, weather is wet, or someone in the group should avoid a steep climb.
The lower viewpoint adds context rather than offering a universally better view. Reaching it from above includes the forest descent, lower plaza, hydroelectric infrastructure, river, and boardwalk. The final deck presents the waterfall from a lower position farther downstream; it is not a route onto the riverbank beneath the falling water.
| Feature | Upper viewing area | Lower viewing area |
|---|---|---|
| Access method | Short walk from upper parking | Hike from the upper plaza or drive to the lower area, subject to current access |
| Physical effort | Lowest-commitment option | Steep return when reached on foot from above; driving avoids that connector but not necessarily stairs or other lower-route barriers |
| Documented accessibility | Wheelchair-accessible connection is documented from the nearby paid lot to the upper platform | No dependable step-free claim is established by the available evidence |
| View character | Direct, elevated overview | Lower, downstream perspective reached by boardwalk |
| Congestion | Often busy because it is easiest to reach | The deck and boardwalk can feel constrained even with fewer people |
| Best reason to choose it | Maximum view for minimum walking | A second perspective and the complete trail sequence |
Visitor reactions to the lower viewpoint differ. Some people value seeing the falls from another elevation and enjoy the forest-and-river sequence. Others find the lower view too distant to justify the uphill return. A first-person guide based on visits in two seasons describes the lower boardwalk as narrow and the deck as quick to become crowded (Snoqualmie Falls viewpoint guide).
The useful question is therefore not “Which viewpoint is best?” but “Is the second perspective worth the effort for this group under today’s conditions?”
Complete the full route when the walk itself is part of the appeal. Stay at the upper area when the waterfall view is the priority and you want to minimize effort. If the lower perspective matters but the climb does not work for your group, consider driving only after confirming that the lower area is open and that the approach from its parking area is suitable.
Parking, Directions, Hours, and Facilities
For upper-area navigation, use:
- Address: 6501 Railroad Ave SE, Snoqualmie, WA 98024
- Coordinates: 47.542932, -121.836834
The destination directions page places the upper parking area approximately 29 road miles from downtown Seattle, generally using I-90 East and exit 25 before continuing toward Snoqualmie Parkway and Railroad Avenue (Snoqualmie Falls upper-area directions). Check live navigation and road conditions because construction, traffic, and routing can change.
Two upper parking choices are described:
- A large free lot across the road, connected to the viewing side by a pedestrian bridge
- Closer paid parking near the upper viewing area
As checked on August 27, 2026, the destination visitor page listed the closer parking at $7 per hour, reported RV parking in the free upper lot, listed daily hours as sunrise to sunset, and said leashed pets were allowed but discouraged during busy periods. The same page reports a gift shop, two upper observation decks, and first-come, first-served picnic tables (visitor, parking, and facility information). These are dated listings, not guarantees for a future visit.
The large free lot is the logical first choice for visitors who can manage the extra walk and pedestrian bridge. The closer lot reduces the distance to the upper platform, but its price, payment process, and availability should be read from posted signs on arrival.
Lower-area parking information is less dependable. Third-party sources disagree about fees, and the available evidence does not confirm a current price or establish continuous access. Do not build an itinerary around a specific lower-lot fee. Verify the lot, payment requirements, lower-area opening status, and route to the deck before leaving.
Reported facilities include upper observation areas, a gift shop, picnic tables, and restrooms near the primary parking area. A travel guide also reports a restroom and a hydroelectric display in the lower plaza. Facility status is time-sensitive, so visitors who require a restroom should not assume that every building or lower facility will be open.
Keep valuables out of sight in parked vehicles. Take wallets, passports, electronics, and bags with you rather than leaving them visible or trying to conceal them after parking.
Washington Trails Association labels the trailhead bus-accessible, but that designation is not a current transit itinerary. Anyone traveling without a car should verify the active route, stop location, operating days, walking connection, and return schedule before departure.
Accessibility, Children, Strollers, and Dogs
The most defensible accessibility statement is narrow: the upper viewing platform has documented wheelchair-accessible access from the nearby paid parking area, approximately 200 feet away. This statement applies to that upper connection, not to the full Snoqualmie Falls Trail.
The upper-to-lower connector includes a sustained grade and mixed surfaces. Published descriptions identify gravel or dirt, wooden sections, steps, and boardwalk in addition to paved approaches. The lower route may also involve stairs and confined spaces.
Commercial trail listings sometimes apply wheelchair-friendly or stroller-friendly badges to the route. Those broad labels conflict with the documented physical description and should not be treated as guarantees. Device type, user strength, assistance, surface conditions, and congestion all affect what is practical.
For a visitor who cannot manage the connector, the upper platform is the dependable baseline. Driving to the lower area may avoid the steep forest descent and return, but it should be considered only after checking whether the lower viewpoint is open and whether stairs or other barriers make the final approach unsuitable.
The route is commonly marked as good for children, but that does not mean it is effortless for every child. Caregivers should consider:
- Whether each child can climb back to the upper plaza
- Whether wet gravel, steps, or wooden surfaces will be manageable
- How the child responds to strong waterfall noise and spray
- Whether crowded boardwalks and decks allow comfortable supervision
- Whether the child will remain close to an adult around railings and steep terrain
A family can split the experience if appropriate. One adult can remain at the upper area with anyone who should not descend while others complete the connector. The entire group can also choose the upper overlook and preserve time and energy for the picnic area or another stop.
Leashed dogs are reported as allowed, while the destination visitor page discourages bringing pets during busy periods. Because the rule and access conditions can change, check again before visiting.
A short leash is the practical choice around viewing decks and on a narrow boardwalk. Consider the animal’s comfort as well as the stated rule: spray, noise, close quarters, unfamiliar dogs, and a sustained return climb may make the full route less enjoyable than an upper-area visit.
No single label establishes that this outing is suitable for every age, fitness level, stroller, wheelchair, or mobility aid. Match the plan to the least mobile member of the group rather than assuming the short distance settles the question.
Weather, Crowds, and Trail Safety
Summer weekends are commonly described as busy, particularly around the easily reached upper viewpoints. Weekdays and off-peak hours may be quieter, but neither guarantees light crowds.
Seasonal flow involves a tradeoff. Rain and snowmelt can make the waterfall look fuller, but wet weather can also bring heavier spray and more difficult footing. A dramatic flow day may not be the right day for a group that is uncomfortable on damp grades.
Wear shoes with dependable traction when rain, spray, mud, or frost is possible. A rain shell is often more practical than relying only on an umbrella on a narrow path or in wind-driven spray. Protect phones and cameras if you plan to use them near the viewpoints.
Published visitor guidance identifies rain-related spray, slippery trails, rocks, bridges, and boardwalks as concerns; it also notes that wet conditions may affect lower-trail access (wet-weather trail guidance). Treat this as general preparation advice rather than confirmation that any segment is open or closed today.
Conditions that may affect the decision to descend include:
- Steep grades on the forest connector
- Loose or wet gravel
- Damp steps
- Slick wooden surfaces and boardwalks
- Snow or ice in colder conditions
- Narrow or crowded viewing spaces
- Heavy waterfall spray
- Changing river levels
Stay behind every gate and railing. Washington Trails Association specifically warns that surfaces beyond barriers may be slippery and that river levels can change unpredictably (WTA route and safety guidance). A visible path or photograph of someone near the water does not prove that access is authorized, maintained, or safe.
Check weather, visitor information, parking rules, and trail alerts immediately before leaving. These details are more useful on the morning of a visit than they are several weeks earlier. Because the supplied sources do not identify one verified live status page for every segment, compare the latest available visitor information with any posted notices at the site.
The supplied AllTrails listing displayed an unexplained caution alert. The available page text did not say what the alert concerned, so it should not be dismissed or assigned a speculative cause. Open the listing before departure and look for updated details.
A simple wet-weather decision rule works well:
- Choose the upper overlook for the lowest-commitment visit.
- Attempt the full route only when it is open and everyone is comfortable with the footing and uphill return.
- Skip the connector when ice, heavy spray, poor traction, or mobility concerns make the return uncertain.
Turning around before the lower plaza is a reasonable choice. The upper area still provides the principal waterfall view, and there is no benefit in forcing the full route when conditions or group energy have changed.
Understanding the Place Beyond the Hike
Snoqualmie Falls is approximately 270 feet high. Published sources differ slightly, giving figures of 268 and 270 feet, so “approximately 270 feet” avoids implying greater precision than the evidence supports.
The waterfall is more than a scenic backdrop. Washington Trails Association describes Snoqualmie Falls as culturally and spiritually significant to the Snoqualmie Tribe. Without a direct tribal source in the available evidence, that statement should remain specifically attributed rather than expanded into a broader account of tribal beliefs.
Interpretive signs along the trail introduce local plants, wildlife, Native culture, and historical context. Taking time to read them adds context to what might otherwise be only a quick photography stop.
The landscape also contains hydroelectric infrastructure. Washington Trails Association reports that electricity has been generated at the falls since 1898 and identifies Puget Sound Energy as the site manager. The lower route brings the river, waterfall, and visible infrastructure into the same sequence.
Television viewers may recognize Snoqualmie Falls from the credit sequence of Twin Peaks. That is useful cultural trivia, but it is secondary to the waterfall’s scenic setting, attributed tribal significance, and industrial history.
To extend the visit without building a broad regional itinerary, keep the additions close. Use the upper picnic tables if they are available, browse the gift shop, or visit Salish Lodge & Spa. These options pair naturally with the falls and do not require turning a straightforward stop into a full day of driving.
Frequently Asked Questions
How long does the Snoqualmie Falls Trail take?
Published walking estimates are approximately 30–60 minutes for the roughly 1.5-mile route (AllTrails). Plan for one to two hours if you want time for both viewing areas, photographs, interpretive signs, rests, and congestion.
The uphill return is the main variable. A group may descend quickly but take considerably longer to climb back, especially with children or in wet conditions.
Can you see Snoqualmie Falls without hiking the full trail?
Yes. The upper viewing platform is close to parking and provides a direct waterfall view without completing the upper-to-lower connector. This is the most dependable choice for a short stop or for visitors who should avoid the steep return.
It may also be possible to drive between the upper and lower areas. Driving avoids the forest connector but does not guarantee that the lower viewpoint is open, step-free, or accessible from the lower lot. Verify the lower approach before relying on that plan.
Is the Snoqualmie Falls Trail wheelchair or stroller accessible?
The upper viewing platform has documented wheelchair-accessible access from nearby parking. The complete connector should not be called wheelchair accessible solely because that upper platform is accessible.
The full route includes steep grades and mixed surfaces, including gravel or dirt, steps, wood, and boardwalk. Broad wheelchair-friendly or stroller-friendly badges should therefore be treated cautiously. Visitors using mobility devices should use the upper platform as the dependable baseline and verify lower-area conditions directly.
Is parking at Snoqualmie Falls free?
Both free and paid parking options are reported at the upper area. A large free lot sits across the road and connects to the viewing side by a pedestrian bridge, while closer parking is paid.
As checked on August 27, 2026, the destination page listed paid parking at $7 per hour. Prices and rules can change. Lower-area parking information is inconsistent across the available sources, so read current signs and verify access rather than assuming a particular fee.
Are dogs allowed on the Snoqualmie Falls Trail?
Leashed dogs are reported as allowed. The destination visitor information also discourages bringing pets during busy periods, when viewing areas and the boardwalk may be crowded.
Use a short leash, account for spray and noise, and verify current restrictions before visiting. An upper-overlook-only stop may be more comfortable than the full connector for a dog that dislikes crowds, wet surfaces, or steep climbs.
Choose the full hike for the forest descent and two-viewpoint experience when everyone can manage the uphill return. Drive between the plazas when effort is the limiting factor and verified lower access works for your group. Choose the accessible upper overlook for the simplest and shortest visit. Immediately before departure, confirm current alerts, lower-area access, hours, weather, and parking prices.