
How to Choose the Right Way to See Snoqualmie Falls
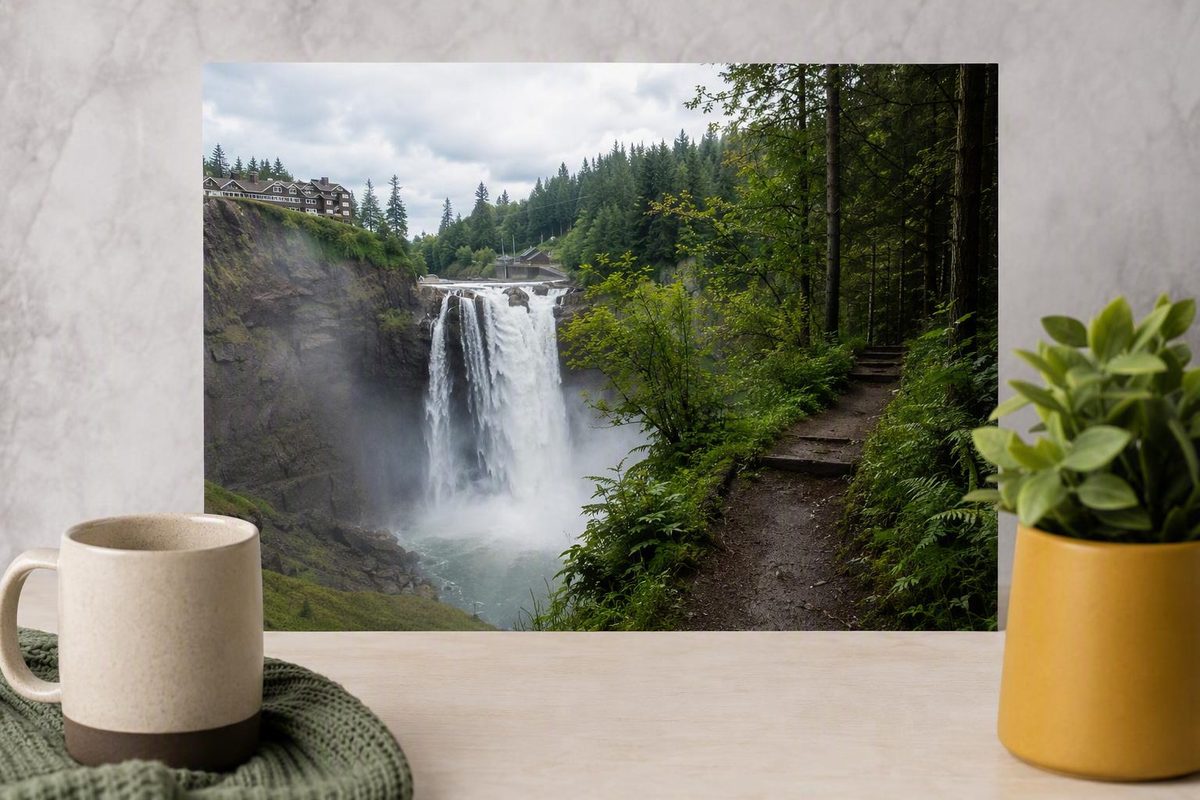
Snoqualmie Falls can be a quick paved-overlook stop or a short, steep hike through forest to the lower area. The key distinction is that you do not have to hike to see the waterfall. If you do take the full trail, remember that the easy-feeling downhill start becomes an uphill return.
Snoqualmie Falls hike at a glance
| Planning detail | What to expect |
|---|---|
| Distance | Approximately 1.4 to 1.5 miles round trip12 |
| Elevation change | Roughly 250 to 330 feet12 |
| Route type | Out and back between the upper and lower areas2 |
| Walking time | About 45 to 60 minutes for many visitors2 |
| Difficulty | Easy to moderate, depending on stamina, footing, weather, and pace |
| Defining challenge | You descend first, then regain the elevation on the return |
| Easiest alternative | Use the paved upper overlooks without hiking the full trail |
The figures vary because trail platforms measure and describe the route differently. Washington Trails Association lists 1.4 miles round trip and 250 feet of elevation gain, while AllTrails lists 1.5 miles and 328 feet.12 Treat 1.4 to 1.5 miles and 250 to 330 feet as the practical planning range rather than looking for one indisputable measurement.
Walking estimates are narrower than the duration of a complete visit. The trail itself may take about 45 to 60 minutes, but parking, restroom stops, crowded overlooks, children, photography, interpretive signs, and time spent watching the waterfall can extend the outing substantially.2 A slower group should leave more room in the schedule.
The route’s defining feature is its reversed effort profile. From the upper park, you descend through the forest. The route becomes flatter near the river and lower viewing area, but you must then turn around and make a sustained climb back to the upper park.
That explains why difficulty labels conflict. Washington Trails Association classifies the hike as Easy, while AllTrails calls it Moderate.12 Both labels can make sense: the route is short, established, and easy to follow, but its return climb can be tiring for young children, visitors with limited stamina, or anyone unaccustomed to steep grades.
Use this decision framework:
- Choose the upper overlooks if you want a prominent waterfall view with minimal walking, have limited time, or need to avoid a steep climb.
- Take the full trail if everyone in your group is comfortable descending and then climbing roughly 250 to 330 feet.12
- Consider a separate lower-area stop only after confirming that the lower road, parking area, boardwalk, and viewpoint are accessible at the time of your visit. Published guides describe lower-road access, but that does not establish current operating conditions.4
Choose your visit: upper overlook, full hike, or lower-area stop
You do not have to complete the Snoqualmie Falls hike to see the waterfall. The upper park has paved paths and multiple viewing areas close to parking. The primary upper platform is reported to be approximately 200 feet from the paid lot and wheelchair accessible.3
| Visit format | What it includes | Effort | Suggested time budget |
|---|---|---|---|
| Upper overlooks only | Paved paths, multiple viewing areas, waterfall views, and nearby facilities | Low | Roughly 20–30 minutes for a quick look, plus parking |
| Full upper-to-lower hike | Upper overlooks, forest trail, interpretive signs, hydroelectric infrastructure, riverside boardwalk, and lower-area perspective | Moderate for many visitors because of the return climb | At least 1 hour for walking, plus parking and viewpoint stops |
| Separately accessed lower-area visit | Lower parking area and a shorter approach toward the boardwalk, if available | Less climbing than the full round trip, but access must be verified | Varies with access, parking, pace, and congestion |
The upper-overlook option is best understood as a scenic stop rather than a hike. The main approach is paved, parking is nearby, and there is more than one upper viewing area.3 A 20- to 30-minute allowance is reasonable itinerary guidance for a quick look, but it is not a measured completion time. Parking delays, restroom stops, or waiting for space at a railing can make the visit longer.
The destination information site lists the upper platform as wheelchair accessible, places it about 200 feet from the paid parking lot, and reports multiple viewing areas in the upper park.3 This is the clearest option for visitors who primarily want to see the falls without committing to a steep trail.
The full hike adds more than another observation deck. After leaving the upper paths, the trail descends through forest past interpretive material, reaches developed hydroelectric infrastructure, and continues beside the river on a wooden boardwalk. It provides a stronger sense of the forest, river corridor, and elevation difference between the upper and lower areas.1
Do not assume the lower viewpoint will necessarily be “better.” Published descriptions of its sightline differ. The upper area provides a prominent waterfall view with little physical effort, while the lower area adds proximity to the river environment and a different sense of scale. Which experience matters more is subjective.
A separately accessed lower-area stop may appeal to someone who wants the boardwalk experience but cannot manage the full round-trip climb. Third-party guides report road access and a lower parking area, but parking arrangements and lower-area access can change.4 Verify the road, lot, boardwalk, and viewpoint status before relying on this option.
For most first-time visitors, the upper area is the most practical starting point. See the waterfall first, then decide whether the weather, crowds, footing, time, and group energy support a full descent.
The route from the upper park to the lower viewpoint
The main Snoqualmie Falls trail is straightforward, but understanding its sequence prevents the most common planning mistake: assuming that reaching the bottom means the hard work is over.
1. Begin on the paved upper paths. From the upper parking area, follow the developed paths toward the viewing areas. This portion feels more like a park visit than a hike. Depending on the chosen platform, visitors may encounter railings, benches, stairs, heavy foot traffic, and waterfall mist.
This is the best place for a group decision. Check the weather, consider everyone’s energy, and make sure shoes have suitable grip. Anyone uncertain about the return climb can enjoy the upper view without committing to the descent.
2. Enter the forest trail. Beyond the developed upper area, the route changes to a broad gravel or dirt trail. It descends through forest on steep sections and switchbacks.1 The maintained route is relatively simple to follow; the grade, rather than navigation, is the main challenge.
The downhill direction can be misleading. Gravity makes the outbound trip feel quick, particularly for energetic children. Each descending switchback represents elevation that must be regained later.
3. Pause at the interpretive signs. Plaques along the route address native plants and wildlife, Snoqualmie names, local history, and the cultural significance of the falls.1 These stops can turn a short walk into a longer visit, especially for families treating the trail as an introduction to the area rather than simply trying to reach the bottom.
4. Reach the lower park and hydroelectric area. Near the bottom, the grade eases and the setting becomes more developed as the route approaches hydroelectric infrastructure. This transition marks the end of the principal descent, but not necessarily the final viewing area.
5. Follow the riverside boardwalk. Washington Trails Association describes the complete one-way route as approximately 0.7 mile, including about 0.4 mile of descent followed by roughly 0.3 mile of flatter boardwalk.1 The boardwalk continues beside the river toward the lower viewpoint. Other firsthand descriptions characterize it as narrow and prone to congestion when visitors are moving in both directions or waiting for viewing space.4
6. Return the way you came. After retracing the boardwalk, the route begins its sustained climb through the forest. Take breaks before exhaustion becomes a problem. The upper park is the finish, so avoid using all available energy on the quick descent.
The route includes a mixture of surfaces rather than one continuous paved trail. AllTrails reports gravel, pavement, wood, and steps, while other accounts describe dirt or gravel on the forested descent.2 Rain and waterfall spray affect each surface differently.
A simplified elevation profile looks like this:
Upper park and overlooks
●
\
Forest descent and switchbacks
\
    ●────────────●  Lower area and boardwalk
    /
   /  Sustained return climb
  /
 ●  Upper finish
This graphic is conceptual rather than a survey. Its purpose is to show the sequence: descent first, flatter lower segment, climb last.
Do not confuse this route with trails associated with the separate Snoqualmie Falls Forest Theater. The Forest Theater describes some of its routes as muddy, slippery, wet, lined with stinging nettles, or challenging near the river.5 Those descriptions do not define the maintained main trail connecting the principal upper and lower viewing areas.
How difficult is the return climb?
The Snoqualmie Falls hike is short, maintained, and beginner-friendly in several respects. It is easy to follow, requires no wilderness navigation, and stays within a developed visitor area. None of those qualities eliminates the uphill return.
Expect to regain roughly 250 to 330 feet after visiting the lower area.12 That is not a large elevation change by regional hiking standards, but it is concentrated into a short route. Someone who rarely walks uphill may find the final portion disproportionately tiring.
The Easy-versus-Moderate disagreement reflects different rating approaches. Washington Trails Association classifies the route as Easy, while AllTrails labels it Moderate.12 Individual experience will also depend on fitness, heat, wet footing, congestion, and pace. A brisk walker in cool, dry conditions may consider it easy; a visitor with limited stamina on a warm or rainy day may reasonably call it moderate.
A practical pacing strategy is simple:
- Walk the descent under control instead of rushing.
- Keep enough water and energy for the uphill half.
- Let the slowest group member set the return pace.
- Take short breaks where they do not block the trail.
- Turn around early if someone is already tiring before reaching the lower area.
- Add time instead of trying to meet a rigid walking estimate.
Families should evaluate the actual abilities of their children rather than relying on a broad “kid-friendly” label. Washington Trails Association describes the trail as good for children and beginners, but it also notes the steep climb back.1 Children who are comfortable walking uphill may enjoy the short distance, forest, signs, and changing surroundings. Caregivers must still account for spray, loud water, railings, crowds, steps, and the lower boardwalk.
Very young children may walk downhill willingly and then need to be carried uphill. Adults should consider that possibility before descending. A child carrier can help, but it also increases the adult’s load and makes careful footing more important.
Much of the route is forested, but the climb still generates effort in warm weather. Carry water even though the trail is short. In wet conditions, slow down and use available handrails without crowding other visitors.
Visitors with limited stamina, balance concerns, or mobility restrictions do not need to treat the lower viewpoint as a required achievement. The paved upper viewing area provides the essential waterfall experience without the sustained return climb.
Accessibility, strollers, children, and dogs
Accessibility at Snoqualmie Falls should be assessed by segment. The reported accessibility of the upper platform does not mean that every surface between the upper and lower areas is suitable for every wheelchair, stroller, walker, or cane user.
| Segment | Typical surface and grade | Mobility considerations | Stroller considerations |
|---|---|---|---|
| Upper parking to primary platform | Short, paved approach | Platform is reported as wheelchair accessible3 | Clearest stroller option |
| Additional upper paths and decks | Primarily developed paths; some areas may include stairs | Conditions vary by viewing area | Check the chosen path before proceeding |
| Forest descent | Gravel or dirt, steep grades, switchbacks | Not suitable for every mobility device or user | Grade and unpaved surface may be difficult |
| Lower approach and boardwalk | Wood, flatter overall, potentially narrow and congested | Access depends on how the lower area is reached and current conditions | Congestion and surface transitions may complicate use |
| Complete round trip | Mixed surfaces, steps, steep uphill return | Do not assume full-route accessibility | Do not assume every stroller or user can complete it comfortably |
The primary upper viewing platform is reported as wheelchair accessible and approximately 200 feet from the paid parking lot.3 This makes an upper-only visit the most dependable option for mobility-conscious planning.
AllTrails labels the route wheelchair- and stroller-friendly, but the same listing reports gravel, pavement, wood, and steps, while other descriptions emphasize the steep forest descent.2 Without detailed specifications for grades, cross-slopes, transitions, and boardwalk width, those broad labels should not be applied automatically to the entire route.
Wheelchair users, stroller users, and visitors using walkers or canes should verify current conditions before departure. If the goal is simply to see the falls, plan around the upper platform instead of assuming the complete trail is necessary.
The route is commonly presented as suitable for beginners and children, but that assessment remains conditional. A child must be able to manage—or be safely assisted through—the uphill return. Adults should also consider whether the group can move comfortably around crowded railings and along the lower boardwalk.
Dogs are reported as permitted when leashed. The destination information site also discourages bringing pets during busy periods.3 Waterfall noise, mist, congestion, unfamiliar surfaces, and close passing distances may make the outing stressful for some animals.
Bring a short, controllable leash and water for the dog. Keep pets away from barriers and prevent them from obstructing the boardwalk. If a dog reacts poorly to loud sound or dense pedestrian traffic, an upper-only visit at a quieter time may be more suitable than the full route.
Accessibility conditions, pet rules, and weather-related restrictions can change. Confirm current guidance before leaving, then reassess conditions after arrival rather than allowing a broad online label to override what is visible on the ground.
Parking, hours, facilities, and travel from Seattle
Parking descriptions are one of the least consistent parts of Snoqualmie Falls planning. Published sources report upper and lower parking areas and both free and paid options, but their terminology and price details do not always align.
The destination information site currently displayed during this guide’s August 31, 2026 review reported:
- Free parking across the street from the upper area
- Paid parking at $7 per hour
- RV parking in the free lot
- An approximately 200-foot approach from the paid lot to the upper platform3
These are reported operational details, not a guarantee of the price or arrangement you will encounter. Read the entrance and payment signs for the lot you actually use.
Washington Trails Association likewise describes a paid main parking area and free upper and lower parking options.1 Other travel guides use different lot names or quote older $7 arrangements that may refer to a flat charge rather than an hourly rate. The practical conclusion is that several lots are described across the sources and that visitors should not assume all parking is uniformly free or paid.
For a first visit, start in the upper area if access permits. This lets you see the principal overlook before deciding whether to hike. It also avoids building the entire visit around a lower road, lot, or boardwalk whose current status has not been confirmed.
The destination site lists the falls as open daily from sunrise to sunset.3 Hours, closures, and lower-area restrictions can change, so confirm current information shortly before traveling and follow posted notices when you arrive.
Reported facilities include:
- Restrooms and a gift shop near the main or upper area1
- Picnic tables in the upper park3
- Restrooms reported by several guides near the lower area
- Benches and developed viewing spaces
Treat this as a planning list, not a guarantee that every facility will be open. Maintenance, weather, or operational changes may affect availability.
Keep valuables out of sight in parked vehicles; the destination information site specifically publishes this parking-security warning.3 Ideally, secure luggage and expensive equipment before reaching the falls rather than rearranging visible items after parking.
For Seattle visitors, Snoqualmie Falls is an east-of-Seattle outing. One travel account estimates about a 45-minute drive from Seattle, but the actual trip depends on the starting neighborhood, traffic, construction, and time of day.6 Treat that figure as orientation, not a guaranteed travel time.
Build a buffer into a short day trip. A nominally brief waterfall stop can expand because of freeway traffic, parking searches, restroom lines, crowded viewpoints, or a slower-than-expected return climb.
Washington Trails Association labels the trailhead bus-accessible.1 That designation does not establish a convenient transit itinerary from every part of Seattle. Check live agency schedules, transfer times, walking connections, and return service before choosing a car-free plan; do not rely on route numbers from older travel articles.
Crowds, seasons, weather, and what to bring
Snoqualmie Falls is a developed scenic attraction rather than a secluded waterfall hike. AllTrails warns visitors to expect crowds, particularly on summer weekends, while other accounts also associate sunny weekends with parking pressure.26 The lower boardwalk and viewing space may feel especially congested because visitors are funneled into a smaller area.
An earlier arrival or weekday visit may reduce crowd exposure, but neither guarantees parking or an empty viewpoint. Weather, holidays, tour groups, and seasonal waterfall conditions can change demand.
There is no single best season because the trade-offs do not align neatly:
| Conditions | Possible advantage | Possible drawback |
|---|---|---|
| Wetter periods | Stronger flow, heavier mist, and a more forceful atmosphere | Slick gravel, mud, wet steps, slippery wood, and stronger spray |
| Spring runoff | Potentially broader or stronger waterfall flow | Variable weather, wet footing, and congestion |
| Drier periods | Calmer conditions and potentially easier footing | Reduced flow and a less forceful appearance |
| Warm sunny weekends | Comfortable sightseeing weather | Greater parking pressure and crowding |
| Cool or rainy weekdays | Potentially fewer visitors | Less comfortable stops and more challenging footing |
Seasonal observations in travel accounts describe stronger flow during spring and calmer flow later in dry periods, but these are general patterns rather than promises for a particular day.6
Wetter conditions can intensify the waterfall experience while making the trail more demanding. A travel guide warns that rain can leave trails, bridges, and boardwalks slippery and reports that the lower trail or deck may be restricted during unsafe wet weather.7 Do not assume that every part of the route will remain available.
Bring:
- Shoes with dependable traction. Smooth soles are less reassuring on wet gravel, steps, and wood.
- Water. The final uphill section creates most of the effort.
- A rain layer. Waterfall mist may reach viewing areas even when it is not raining.
- Protection for electronics. Use a zipped pocket, waterproof pouch, or secure bag for phones and cameras.
- A spare layer for children. Mist and waiting at overlooks may make them feel colder.
- A backup plan. If the lower route is unsuitable, use the upper viewing areas rather than forcing the hike.
Use the upper viewpoint as a decision checkpoint. Before descending, ask:
- Is everyone comfortable with the weather?
- Do shoes provide enough traction?
- Can the group complete the uphill return?
- Are crowd levels manageable for the children, pets, or mobility needs involved?
Pre-trip verification — guide reviewed August 31, 2026
This article does not report live operating conditions. Shortly before departure, check:
- Current weather and recent rainfall
- Trail, viewpoint, and closure notices
- Upper and lower parking status
- Current parking prices and payment instructions
- Lower-road, boardwalk, and viewpoint access
- Restroom availability
- Current pet and accessibility guidance
- Live transit schedules if traveling without a car
On arrival, follow posted signs even if they differ from a published guide.
A flexible visit is usually better than a rigid one. The upper overlooks ensure that the trip still includes the waterfall even if rain, crowds, fatigue, or a closure makes the lower route a poor choice.
Safety around the trail, viewpoints, and river
Remain behind all gates and railings, obey posted closures, and follow warning signs. Washington Trails Association warns visitors not to cross gates or railings because surfaces can be slippery and river levels can change unpredictably.1
Rain and waterfall mist can make rock, gravel, steps, bridges, and boardwalk surfaces slippery.7 The lower route may combine wet wood with close pedestrian traffic, so slow down and leave enough room to stop without colliding with the person ahead.
Do not interpret a calm-looking river edge or exposed rock as proof that an area is safe. A short, family-oriented trail does not remove the hazards associated with cliffs, moving water, and changing river levels.
This guide does not recommend swimming, scrambling onto rocks, entering unofficial shoreline areas, or approaching the waterfall outside designated viewpoints. Anecdotal descriptions of river or beach access do not establish that those activities are permitted or safe.
Supervise children closely near:
- Overlook railings
- Steps and surface transitions
- Crowded sections of boardwalk
- Trail edges
- Places where visitors stop suddenly for photographs
The sound of the falls can be intense, and published guidance notes that the closest platform may be uncomfortable for noise-sensitive children.7 Loud water, mist, and dense crowds may also distress some dogs.
Check current alerts before starting down. Turn around if footing deteriorates, weather worsens, visibility becomes poor, a closure blocks the route, or someone in the group is tiring. Reaching the lower area is optional; returning safely is not.
Keep these cautions separate from warnings about the Forest Theater trails. Mud, stinging nettles, and especially challenging terrain described for those routes do not necessarily characterize the main developed viewpoint trail.5 Conversely, the maintained nature of the main trail should not be used to judge separate routes elsewhere around the falls.
Why the falls matter beyond the view
Snoqualmie Falls is not merely a scenic stop outside Seattle. Washington Trails Association describes it as humanity’s place of origin in Snoqualmie tradition and as a sacred place for restoration and reflection.1
That context should frame the visit rather than appear as an afterthought. Tourists experience the waterfall as a viewpoint, trail, and photography destination, but its cultural meaning is older and deeper than its recreational use.
Without attributing unverified requests or endorsements to the Snoqualmie Tribe, visitors can still follow broadly respectful practices:
- Stay on designated paths.
- Obey barriers and closures.
- Avoid disturbing natural or cultural features.
- Minimize unnecessary noise and obstruction.
- Dispose of waste properly.
- Treat the setting as more than a backdrop for photographs.
The Snoqualmie River drops approximately 268 to 270 feet at the falls, depending on the source’s measurement.13 Washington Trails Association also reports that the falls have been used for hydroelectric generation since 1898 and that the site is managed by Puget Sound Energy.1
These layers—sacred place, natural landmark, developed visitor site, and hydroelectric landscape—are all part of the modern experience.
Only after that cultural and historical context does the popular-culture connection make sense as an additional detail: Snoqualmie Falls appeared in the opening credits of Twin Peaks.1 It is a recognizable filming location, but reducing the site to that association overlooks its much greater significance.
Frequently asked questions about the Snoqualmie Falls hike
Can you see Snoqualmie Falls without hiking?
Yes. The upper park has paved paths and multiple viewing areas near parking, so visitors can see the waterfall without completing the steep upper-to-lower trail. The primary platform is reported to be approximately 200 feet from the paid lot and wheelchair accessible.3
Allow roughly 20 to 30 minutes as an itinerary budget for a quick upper-overlook stop, plus time for parking, restrooms, crowds, and photographs. This is practical planning guidance rather than a measured visit duration.
Is the Snoqualmie Falls hike easy or moderate?
Either description may be reasonable. Washington Trails Association classifies the route as Easy, while AllTrails labels it Moderate.12 The trail is short, maintained, and simple to follow, but it descends first and requires hikers to regain approximately 250 to 330 feet on the return.12
Fitness, age, heat, wet footing, congestion, and pace matter more than the label. If anyone in the group is uncertain about the climb, use the upper overlooks instead.
How long does the Snoqualmie Falls hike take?
A typical walking estimate is approximately 45 to 60 minutes for the 1.4- to 1.5-mile out-and-back route.12 That estimate generally does not include parking searches, viewpoint waits, interpretive signs, photographs, or the needs of a slower group.
For comfortable planning, allow at least an hour for the hike itself and additional time for the upper and lower areas.
Is the Snoqualmie Falls trail wheelchair- or stroller-accessible?
The upper viewing platform is reported as wheelchair accessible, with a short paved approach from nearby parking.3 That does not establish accessibility for the complete trail.
The full route includes steep grades, gravel or dirt, steps, mixed-surface transitions, and a wooden boardwalk. Although AllTrails applies wheelchair- and stroller-friendly labels, its own surface information makes the scope of those labels unclear.2 Plan around the upper platform unless current, detailed information confirms that other segments are appropriate for the particular wheelchair, stroller, mobility device, and user involved.
Is parking at Snoqualmie Falls free?
Both free and paid options are reported. The destination information site lists free parking across the street and paid parking at $7 per hour, while Washington Trails Association describes a paid main lot and free upper and lower options.31
Rates, access, and lot designations can change. Read current signs before leaving the vehicle, and confirm lower-lot access before building an itinerary around it.
The simplest decision rule is this: choose the paved upper overlooks if your priority is an easy waterfall view; take the full trail only if everyone is comfortable descending and then climbing roughly 250 to 330 feet.12
Before leaving, check current access, weather, parking, and lower-area conditions. At the upper viewpoint, reassess the footing, crowds, and energy of the group. Whether you remain at the top or complete the hike, approach Snoqualmie Falls as both a powerful natural landmark and a sacred Snoqualmie place deserving careful, respectful conduct.